Total Cooking Time: 30–35 minutes
Difficulty Level: Easy
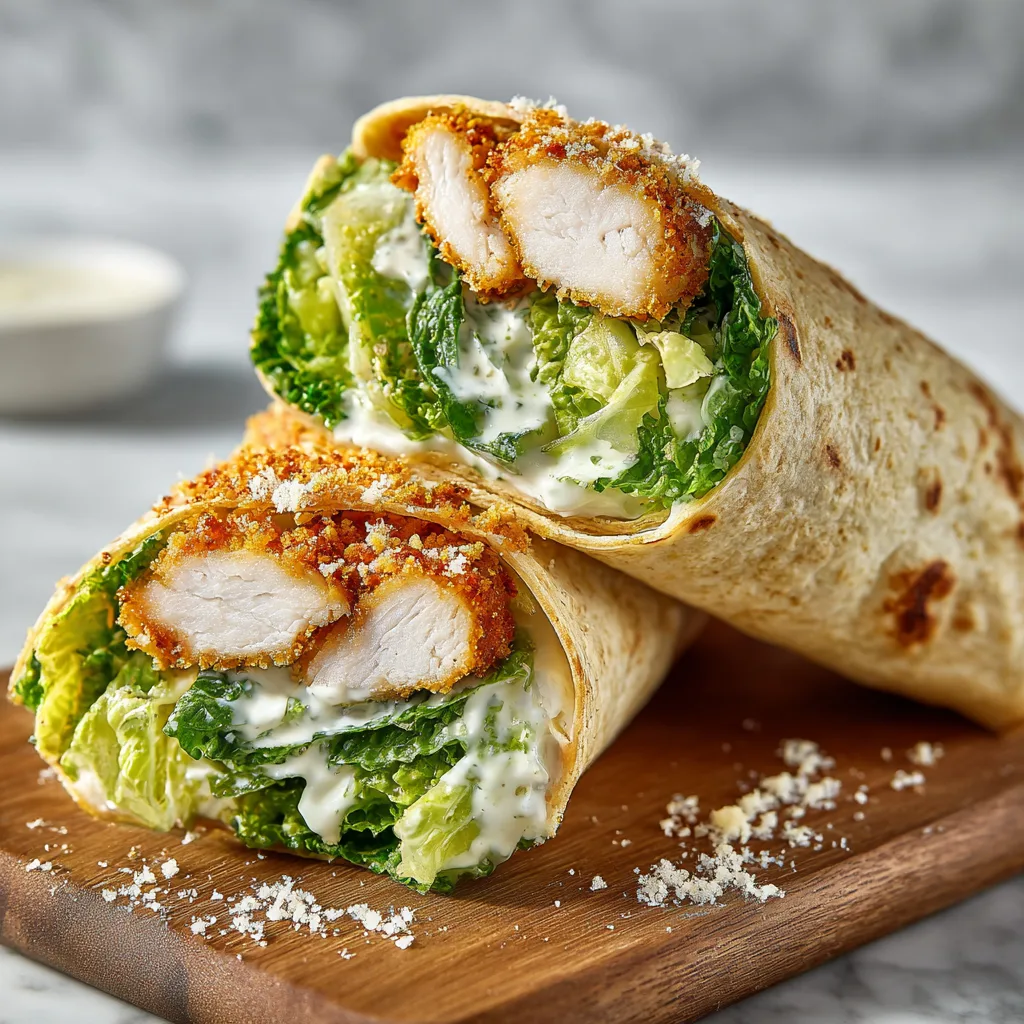
There’s something undeniably satisfying about a perfectly made Chicken Caesar wrap—especially when it features crispy, golden chicken paired with cool, creamy dressing and fresh, crunchy lettuce. This Crispy Chicken Caesar Wrap Recipe brings that restaurant-quality experience straight into your kitchen, with simple steps and everyday ingredients.
Each bite delivers a beautiful balance of textures and flavors: the crunch of perfectly breaded chicken, the crisp freshness of romaine lettuce, the rich creaminess of Caesar dressing, and the subtle saltiness of Parmesan cheese. Wrapped in a soft tortilla and lightly toasted, it becomes a handheld meal that feels both indulgent and refreshing at the same time.
This recipe is perfect for lunch, dinner, or even meal prep. It’s especially loved by those who enjoy classic flavors with a bit of crunch. Whether you’re cooking for family or just want to recreate your favorite café-style wrap at home, this dish won’t disappoint. Each wrap contains approximately 450–600 calories, depending on portion size and dressing.
Key Ingredients
Each ingredient plays a role in achieving that authentic, restaurant-style Caesar wrap flavor and texture.
Chicken Breast (2 large, sliced into strips) – Lean protein that becomes crispy and golden when breaded and cooked.
Flour Tortillas (4 large) – Soft and flexible, perfect for wrapping the filling securely.
Breadcrumbs (1 cup) – Creates the crispy coating for the chicken.
Parmesan Cheese (½ cup, grated) – Adds salty, nutty richness to both the coating and filling.
Eggs (2, beaten) – Helps the breadcrumbs stick to the chicken.
All-Purpose Flour (½ cup) – First layer for breading, ensuring a crisp crust.
Garlic Powder (1 teaspoon) – Enhances savory flavor.
Onion Powder (½ teaspoon) – Adds depth and subtle sweetness.
Salt (1 teaspoon) – Brings out all the flavors.
Black Pepper (½ teaspoon) – Adds a mild kick.
Olive Oil or Cooking Oil (for frying) – Ensures the chicken crisps up beautifully.
Romaine Lettuce (2 cups, chopped) – Crisp, fresh, and classic for Caesar dishes.
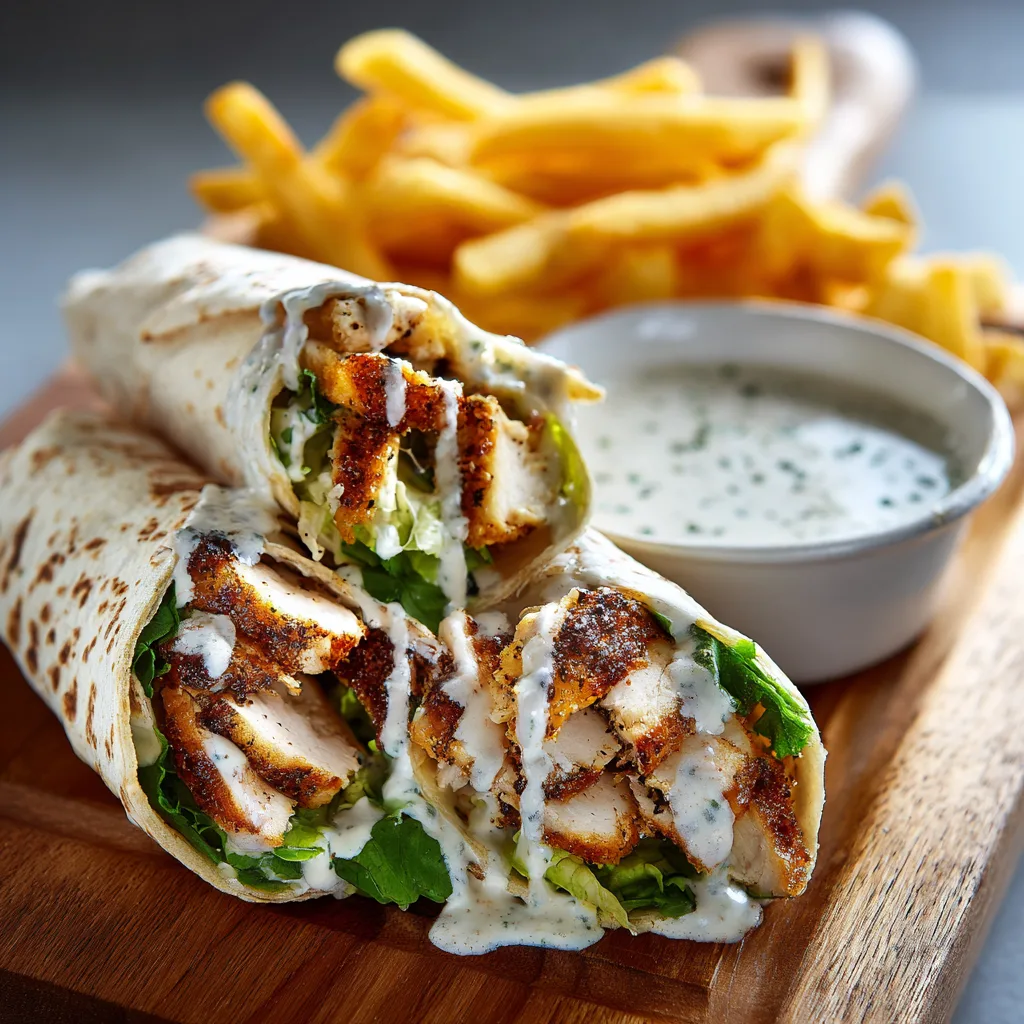
Caesar Dressing (½–¾ cup) – Creamy, tangy, and rich; the heart of the flavor.
Croutons (½ cup, crushed) – Adds extra crunch and texture.
Lemon Juice (1 tablespoon) – Brightens the overall taste.
Cherry Tomatoes (optional, 1 cup halved) – Adds a juicy, slightly sweet contrast.
Print
Crispy Chicken Caesar Wrap Recipe – Easy & Restaurant Style
- Total Time: 30–35 minutes
- Yield: 4 wraps 1x
Description
Crispy Chicken Caesar Wraps combine golden breaded chicken, fresh romaine lettuce, creamy Caesar dressing, and Parmesan cheese in a soft tortilla. This easy recipe delivers a perfect balance of crunch and flavor for a satisfying meal.
Ingredients
- 2 large chicken breasts, sliced into strips
- 4 large flour tortillas
- 1 cup breadcrumbs
- 1/2 cup Parmesan cheese, grated
- 2 eggs, beaten
- 1/2 cup all-purpose flour
- 1 teaspoon garlic powder
- 1/2 teaspoon onion powder
- 1 teaspoon salt
- 1/2 teaspoon black pepper
- Olive oil or cooking oil for frying
- 2 cups romaine lettuce, chopped
- 1/2–3/4 cup Caesar dressing
- 1/2 cup croutons, crushed
- 1 tablespoon lemon juice
- 1 cup cherry tomatoes, halved (optional)
Instructions
1. Prepare three bowls: flour with seasoning, beaten eggs, and breadcrumbs mixed with Parmesan.
2. Coat chicken in flour, then egg, then breadcrumb mixture.
3. Heat oil in a skillet over medium heat.
4. Cook chicken for 4–5 minutes per side until golden and crispy.
5. Remove and drain on paper towels.
6. Toss romaine lettuce with Caesar dressing and lemon juice.
7. Warm tortillas for 20 seconds until soft.
8. Place lettuce on each tortilla.
9. Add crispy chicken strips on top.
10. Sprinkle with Parmesan and crushed croutons.
11. Add cherry tomatoes if desired.
12. Fold sides and roll tightly into wraps.
13. Toast wraps in a skillet for 1–2 minutes per side until golden.
14. Slice and serve.
Notes
- Use panko breadcrumbs for extra crispiness.
- Do not overdress the lettuce to avoid soggy wraps.
- Reheat chicken in an oven or air fryer for best texture.
- Store ingredients separately for meal prep.
- Add grilled chicken instead for a lighter option.
- Prep Time: 15 minutes
- Cook Time: 15–20 minutes
- Category: Lunch
- Method: Stovetop
- Cuisine: American
Nutrition
- Serving Size: 1 wrap
- Calories: 450–600
- Sugar: 3g
- Sodium: 750mg
- Fat: 22g
- Saturated Fat: 7g
- Unsaturated Fat: 13g
- Trans Fat: 0g
- Carbohydrates: 40g
- Fiber: 3g
- Protein: 30g
- Cholesterol: 90mg
How to Make It (Step-by-Step Method)
Start by preparing your breading station. Set up three shallow bowls: one with flour mixed with salt, pepper, garlic powder, and onion powder; one with beaten eggs; and one with breadcrumbs mixed with grated Parmesan cheese.
Take each strip of chicken and coat it first in the flour mixture, then dip it into the egg, and finally coat it thoroughly in the breadcrumb-Parmesan mixture. Press gently to ensure the coating sticks well.
Heat oil in a skillet over medium heat. Once hot, add the breaded chicken strips in batches, making sure not to overcrowd the pan. Cook for about 4–5 minutes per side until golden brown and crispy. The internal temperature should reach 75°C (165°F). Remove and place on a paper towel-lined plate to drain excess oil.
While the chicken rests, prepare the Caesar filling. In a large bowl, toss the chopped romaine lettuce with Caesar dressing and a squeeze of lemon juice. Mix until evenly coated but not overly soggy.
Warm the tortillas in a dry skillet or microwave for about 20 seconds to make them pliable.
Now assemble your wraps. Lay a tortilla flat and add a layer of Caesar-dressed lettuce. Place a few crispy chicken strips on top, then sprinkle with extra Parmesan cheese and crushed croutons for added crunch. Add cherry tomatoes if using.
Fold in the sides of the tortilla and roll tightly from the bottom up to form a secure wrap.
For that restaurant-style finish, place the wrap seam-side down in a skillet and toast for 1–2 minutes per side until lightly golden and slightly crispy on the outside.
Let the wraps rest briefly before slicing in half. This helps everything stay in place and makes for a cleaner presentation.
Serving Suggestions
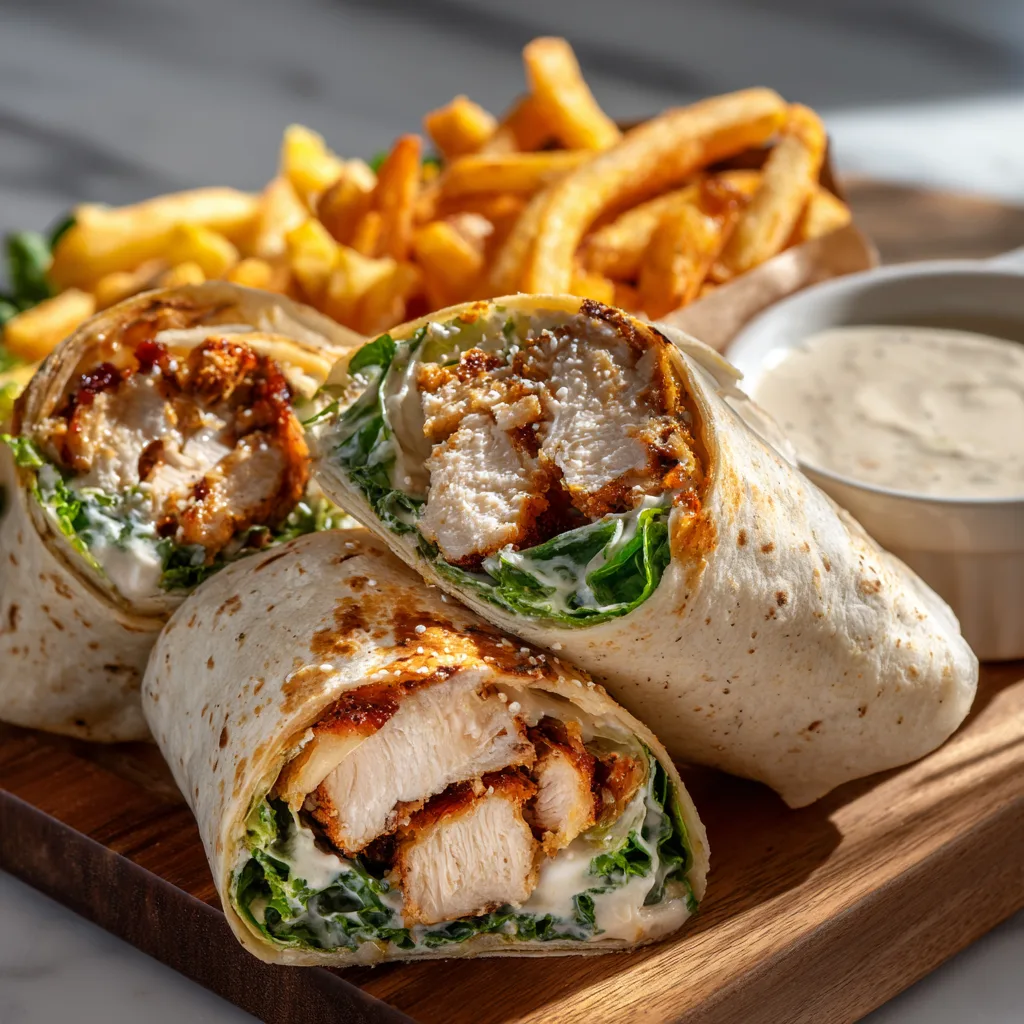
These crispy chicken Caesar wraps are incredibly versatile when it comes to serving. For a classic restaurant-style presentation, slice each wrap diagonally and arrange them on a plate with a small bowl of extra Caesar dressing on the side for dipping. The creamy dressing enhances every bite and gives that signature café feel right at home. Pair with seasoned fries, sweet potato wedges, or even a light soup for a complete and comforting meal.
If you’re preparing these wraps for guests or a casual gathering, consider turning them into bite-sized portions. Slice the wraps into smaller pieces and secure them with toothpicks for easy serving. Arrange them on a platter with fresh lettuce leaves and lemon wedges for a vibrant, appealing display. This makes them perfect for parties, picnics, or lunch spreads.
For a lighter approach, serve the crispy chicken and Caesar salad as a bowl instead of a wrap. Add a base of greens or grains like quinoa, then top with sliced crispy chicken, shaved Parmesan, and croutons. Drizzle with dressing and finish with a squeeze of lemon for a fresh and satisfying alternative.
Storage + Meal Prep
These wraps are excellent for meal prep, especially when you store the components separately. Keep the crispy chicken in an airtight container in the refrigerator for up to 3 days. To maintain its crispiness, reheat it in an oven, air fryer, or skillet rather than a microwave.
Store the lettuce and dressing separately to prevent sogginess. The Caesar salad should be tossed just before assembling the wraps to keep it fresh and crisp. Tortillas can be kept at room temperature in a sealed bag.
If you need to prepare wraps ahead of time, assemble them without too much dressing and wrap tightly in parchment paper or foil. Store in the refrigerator for up to 24 hours. Before serving, you can toast them lightly in a pan to refresh the texture.
Freezing is not recommended for fully assembled wraps, as the lettuce and dressing do not hold up well. However, the breaded chicken can be frozen after cooking for up to 2 months. Reheat in the oven until hot and crispy before using.
Conclusion
This Crispy Chicken Caesar Wrap Recipe brings together everything you love about a classic Caesar salad and transforms it into a satisfying, handheld meal. With its crunchy chicken, creamy dressing, and fresh lettuce, it delivers a perfect balance of textures and flavors in every bite.
What makes this recipe truly special is how easy it is to recreate a restaurant-quality dish at home. It’s simple enough for everyday cooking yet impressive enough to serve to guests. Plus, it’s highly customizable—add your favorite toppings, adjust the dressing, or experiment with different wraps to make it your own.
Give this recipe a try and enjoy the comfort of a crispy, creamy, and delicious wrap that never goes out of style. Once you do, it’s sure to become a regular favorite in your kitchen.