Total Cooking Time: 1 hour
Difficulty Level: Easy
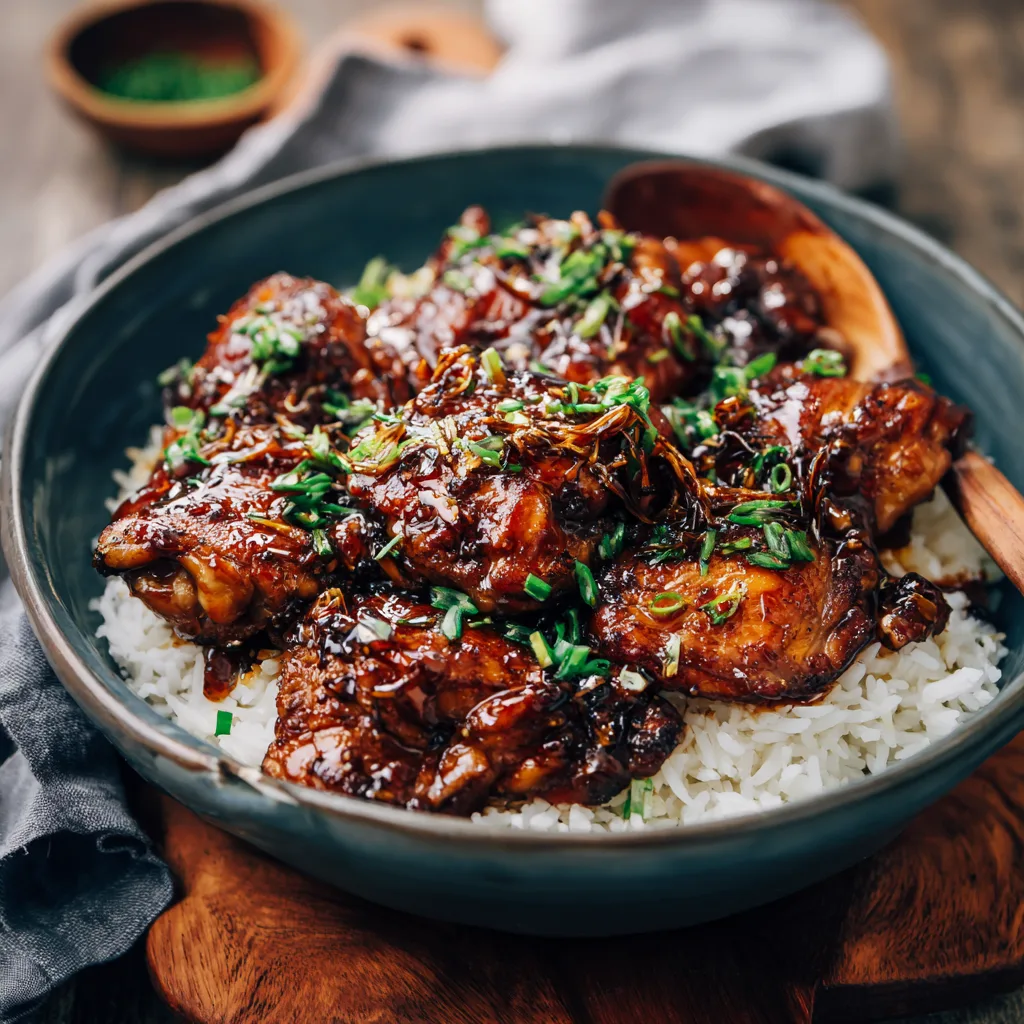
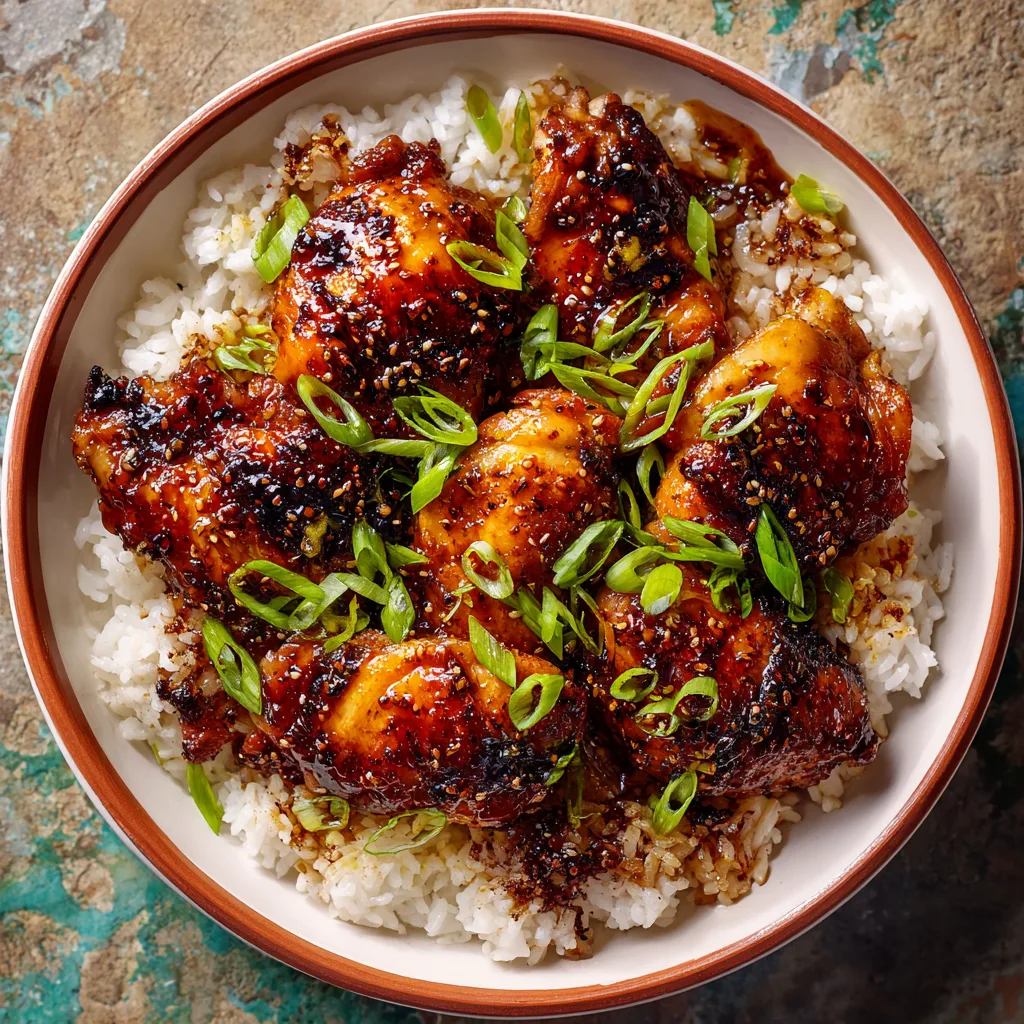
Sticky soy sauce chicken is the kind of dish that makes your kitchen smell like comfort itself. As it cooks, the air fills with the savory aroma of soy sauce simmering down with sugar, garlic, and ginger, turning glossy and rich. The chicken emerges lacquered in a deep mahogany glaze, tender enough to pull apart with a fork, with edges that cling slightly to your fingers in the best possible way. It’s warm, cozy food—deeply satisfying without being heavy or complicated.
What makes this dish special is how it delivers that same soothing, nostalgic feeling as chicken and dumplings, but with far less effort and cleanup. There’s no rolling dough or babysitting a pot; instead, everything comes together in one pan with ingredients you likely already have. It’s perfect for busy weeknights, lazy Sundays, or anytime you want a meal that feels like a hug. Serve it with rice, noodles, or vegetables, and it becomes a complete, crowd-pleasing dinner. Depending on the cut of chicken and serving size, this dish averages 350–420 calories per portion, making it both comforting and practical.
Key Ingredients
Sticky soy sauce chicken relies on simple pantry staples that transform into something rich and deeply flavorful once cooked together.
- Chicken Thighs – Juicy and forgiving, they stay tender and absorb the sauce beautifully.
- Soy Sauce – The savory backbone, delivering saltiness and umami depth.
- Brown Sugar – Melts into the sauce, creating stickiness and caramel notes.
- Honey – Adds gloss and a smooth, rounded sweetness.
- Garlic Cloves – Bring savory warmth and aroma to the glaze.
- Fresh Ginger – Adds brightness and gentle heat that balances richness.
- Rice Vinegar – Cuts through sweetness with light acidity.
- Sesame Oil – Nutty and aromatic, rounding out the sauce.
- Water or Chicken Broth – Loosens the sauce so it reduces properly without burning.
- Black Pepper – Subtle heat and depth.
- Red Pepper Flakes – Optional, for a gentle kick.
- Green Onions – Freshness and color for finishing.
- Sesame Seeds – Texture and visual appeal.
- Neutral Oil – Helps brown the chicken evenly.
- Salt – Used lightly, as soy sauce carries most of the seasoning.
How to Make It (Step-by-Step Method)
1. Prepare the chicken
Pat the chicken thighs dry with paper towels. Lightly season with black pepper and a small pinch of salt. Let them sit at room temperature for 10 minutes to ensure even cooking.
2. Sear for flavor
Heat a large skillet or shallow pan over medium-high heat. Add neutral oil and swirl to coat. Place the chicken thighs skin-side down (or smooth side down if skinless) and sear for 5–6 minutes until deeply golden and crisp. Flip and cook another 3–4 minutes, then remove chicken and set aside.
3. Build the sauce
Lower heat to medium. In the same pan, add garlic and ginger. Sauté for 30–45 seconds until fragrant but not browned. Stir in soy sauce, brown sugar, honey, rice vinegar, sesame oil, water or broth, and red pepper flakes if using.
4. Simmer and glaze
Bring the sauce to a gentle simmer, stirring to dissolve sugar. Return chicken to the pan, nestling it into the sauce. Reduce heat to medium-low, cover, and simmer for 20 minutes, flipping chicken halfway through.
5. Thicken and finish
Remove the lid and continue cooking for 8–10 minutes, spooning sauce over the chicken frequently. The sauce should reduce into a thick, sticky glaze that coats the chicken and clings to the pan. Look for glossy texture and bubbling edges.
6. Rest and garnish
Remove from heat and let rest for 5 minutes. Sprinkle with green onions and sesame seeds before serving.
Serving Suggestions
Sticky soy sauce chicken is incredibly versatile when it comes to serving, making it easy to tailor to the mood or occasion. For a classic, cozy presentation, serve the chicken over a bed of steamed white rice, spooning extra sauce generously on top. The rice soaks up every drop of the sticky glaze, creating a deeply comforting bowl that feels like something you’d crave on a cold evening. Add a side of simple sautéed greens or steamed broccoli for balance and color.
For a more elevated feel, slice the chicken and fan it over noodles—lo mein, rice noodles, or even buttery egg noodles work beautifully. Garnish with scallions and sesame seeds for a polished finish. This dish also works well family-style: arrange the chicken on a large platter, drizzle with sauce, and let everyone serve themselves. For something fun and interactive, turn it into a build-your-own bowl night with rice, noodles, pickled vegetables, shredded cabbage, and chili oil. No matter how you plate it, the sticky glaze and tender chicken make it feel special and satisfying every time.
Storage + Meal Prep
Sticky soy sauce chicken is excellent for leftovers and meal prep. Store cooled chicken in an airtight container in the refrigerator for up to 4 days. Keep the chicken with its sauce to prevent drying and to deepen flavor over time—the glaze actually gets better by day two.
Freezing is possible, though best done without garnishes. Freeze chicken and sauce together for up to 2 months, then thaw overnight in the refrigerator. To reheat, warm gently on the stovetop over low heat with a splash of water or broth to loosen the sauce. Microwaving works in short intervals, but stovetop reheating preserves texture best. Before serving leftovers, refresh with freshly chopped green onions or a drizzle of sesame oil. These small additions bring the dish back to life and make it taste freshly cooked.
Conclusion
Sticky soy sauce chicken is proof that comfort food doesn’t have to be complicated to be deeply satisfying. With its glossy glaze, tender meat, and rich, savory-sweet flavor, it delivers that same cozy feeling as more involved classics—without the extra steps. It’s the kind of recipe you’ll turn to again and again when you want something reliable, warming, and genuinely delicious.
Make it once, and it’s likely to earn a permanent spot in your dinner rotation. Adjust the sweetness, add spice, or pair it with your favorite sides to make it your own. If you try it, share how you served it or what tweaks you loved—this is one of those dishes that’s meant to be enjoyed, adapted, and shared.