Total Time: 5–7 days (5 minutes a day)
Difficulty Level: Beginner-Friendly
Starting a sourdough starter feels almost magical. With just flour, water, and a little patience, you create a living culture that bubbles, rises, and transforms simple ingredients into deeply flavorful bread. Watching your starter come to life day by day is incredibly rewarding—the subtle sour aroma, the creamy texture, and those tiny bubbles forming on the surface are all signs that something wonderful is happening. For first-time bakers, this process can feel intimidating, but when done correctly, it’s surprisingly simple and deeply satisfying.
What makes this sourdough starter recipe foolproof is its flexibility and forgiving nature. There’s no complicated schedule, no special equipment, and no stress if you miss the perfect hour. This method is designed specifically for beginners who want consistent results without confusion. Whether you’re baking crusty artisan loaves, chewy pizza dough, fluffy pancakes, or rustic sandwich bread, this starter becomes the foundation of it all. Once active, it contains minimal calories on its own, but it unlocks incredible flavor, texture, and digestibility in everything you bake with it.
Key Ingredients
All-Purpose Flour – Easy to work with and readily available, forming a reliable base
Whole Wheat Flour – Jumpstarts fermentation with natural wild yeast and nutrients
Filtered Water – Prevents chlorine from slowing fermentation
Glass Jar – Allows you to monitor bubbles and growth clearly
Digital Scale (optional) – Helps with accuracy and consistency
Wooden Spoon or Spatula – Gentle mixing without reacting with acids
Rubber Band or Marker – Tracks starter growth visually
Clean Kitchen Towel or Loose Lid – Protects the starter while allowing airflow
Warm Room Temperature – Encourages active fermentation
Time – The most important ingredient for success
Patience – Essential for letting the culture develop naturally
Consistency – Regular feeding builds strength and reliability
How to Make It (Step-by-Step Method)
Day 1:
In a clean glass jar, mix 50 grams whole wheat flour with 50 grams filtered water until smooth and thick, similar to pancake batter. Scrape down the sides, loosely cover the jar, and place it somewhere warm—ideally between 70–75°F (21–24°C). Let it rest for 24 hours.
Day 2:
You may see a few bubbles or notice a mild aroma. Discard half of the mixture, then feed with 50 grams all-purpose flour and 50 grams water. Stir well, cover loosely, and let rest another 24 hours.
Days 3–4:
Activity should increase. You’ll notice more bubbles, a slightly tangy smell, and maybe some rise. Continue discarding half and feeding once daily with 50 grams flour and 50 grams water. Keep the starter warm and undisturbed between feedings.
Days 5–7:
Your starter should double in size within 4–6 hours of feeding and look airy and bubbly. Switch to feeding twice daily if growth slows. When the starter consistently rises and falls and smells pleasantly sour, it’s ready to bake with. Let it rest for 5–10 minutes after feeding before using in recipes.
Serving Suggestions
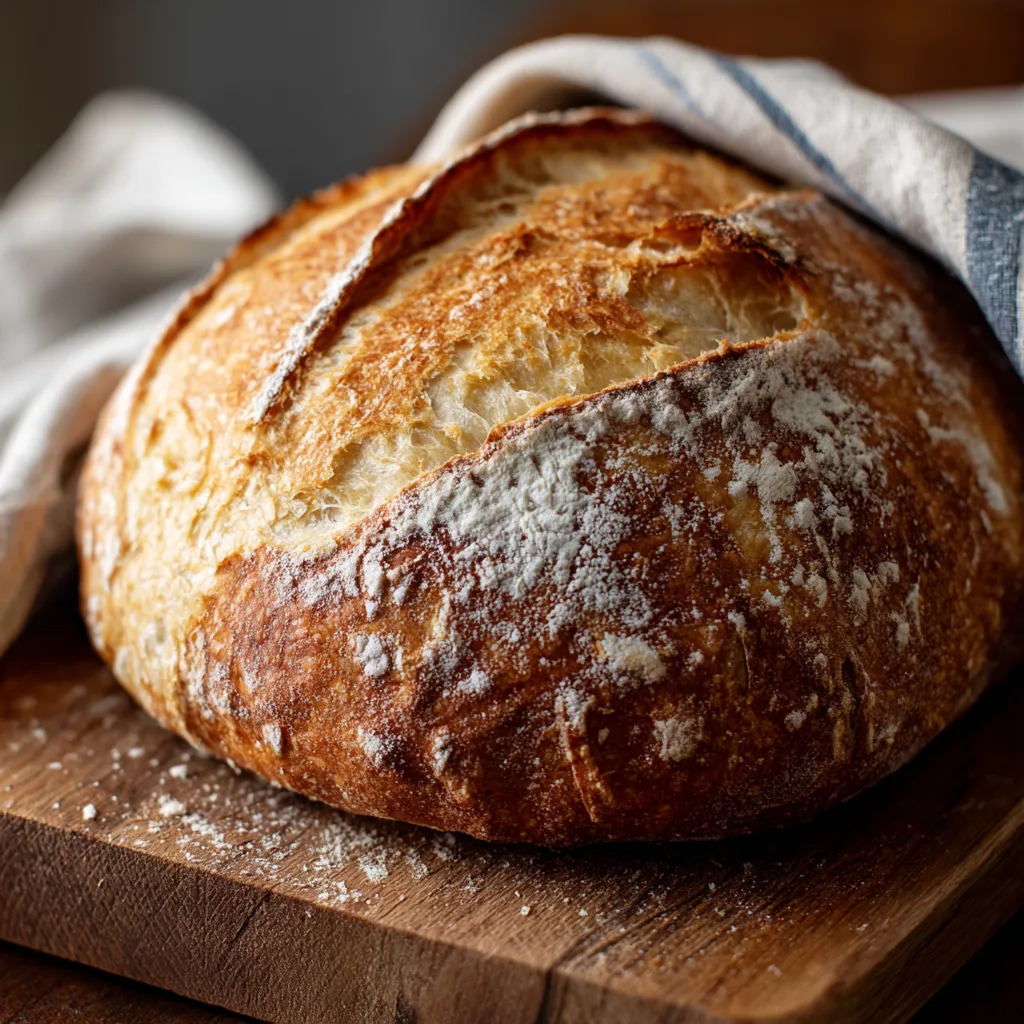
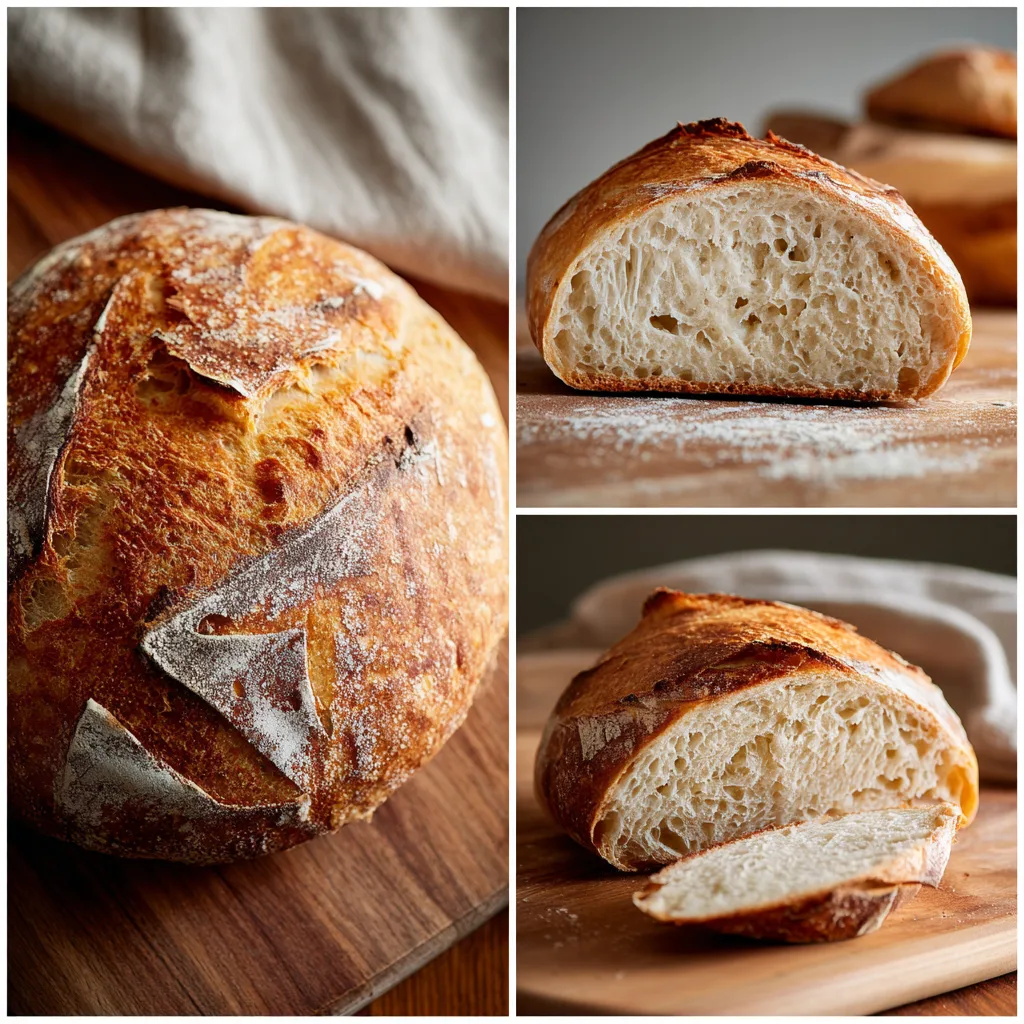
While you don’t “serve” sourdough starter on its own, the ways you can use it are endless once it’s active. The most classic option is, of course, homemade sourdough bread. That first loaf—crackly crust, open crumb, and rich flavor—feels like a rite of passage for new bakers. Slice it thick, toast it lightly, and enjoy with butter, honey, or olive oil to truly appreciate what your starter has created.
Beyond bread, sourdough starter shines in everyday baking. Use discard for pancakes, waffles, crackers, banana bread, or pizza dough. These recipes add subtle tang and incredible texture without much effort. A single starter can support both weekend baking projects and quick weekday recipes, making it one of the most versatile kitchen staples you’ll ever maintain. Once you get comfortable, you’ll find yourself looking for excuses to bake just to use it.
Storage + Maintenance
Once your starter is active, you have two main storage options. If you bake frequently, keep it at room temperature and feed it once or twice daily. Store it in a loosely covered jar and discard regularly to maintain balance. If you bake occasionally, store it in the refrigerator and feed it once a week. Cold storage slows fermentation while keeping the culture alive.
To use refrigerated starter, remove it 1–2 days before baking and feed it until active and bubbly again. Always use clean utensils, and never seal the jar tightly, as pressure can build. If a layer of liquid (hooch) forms on top, simply stir it in or pour it off before feeding. Properly cared for, a sourdough starter can last indefinitely and even be passed down through generations.
Conclusion
Creating your first sourdough starter is more than just a recipe—it’s an experience. It teaches patience, observation, and trust in the process, rewarding you with flavors and textures that commercial yeast can’t match. With this foolproof method, even beginners can feel confident from day one, knowing that small imperfections won’t ruin the result.
Once your starter is active, it becomes a living part of your kitchen, ready to transform simple ingredients into something truly special. Don’t be afraid to experiment, adjust, and learn as you go. If you try this recipe, share your progress, ask questions, and enjoy the journey—because great sourdough always starts with a little curiosity and a lot of heart.